Set up your Custom Bot
Create a Discord application, copy the token, turn on the intents, paste the token, invite the bot and start it.
Updated Oct 30, 2026 · 1 min read
Setting up a Custom Bot takes seven short steps. The dashboard shows them with an animation.
1. Create the application
- Open the Discord Developer Portal and sign in.
- Click New Application.
- Type your bot's name, accept the terms and click Create.
2. Copy the token
- Open the Bot tab on the left.
- Click Reset Token, confirm, then Copy.
- Keep the token for step 4.
Never share the token. Anyone who has it controls your bot. Green-bot staff never ask for it.
3. Turn on the intents
- Still in Bot, scroll to Privileged Gateway Intents.
- Turn on Server Members Intent and Message Content Intent.
- Click Save Changes.
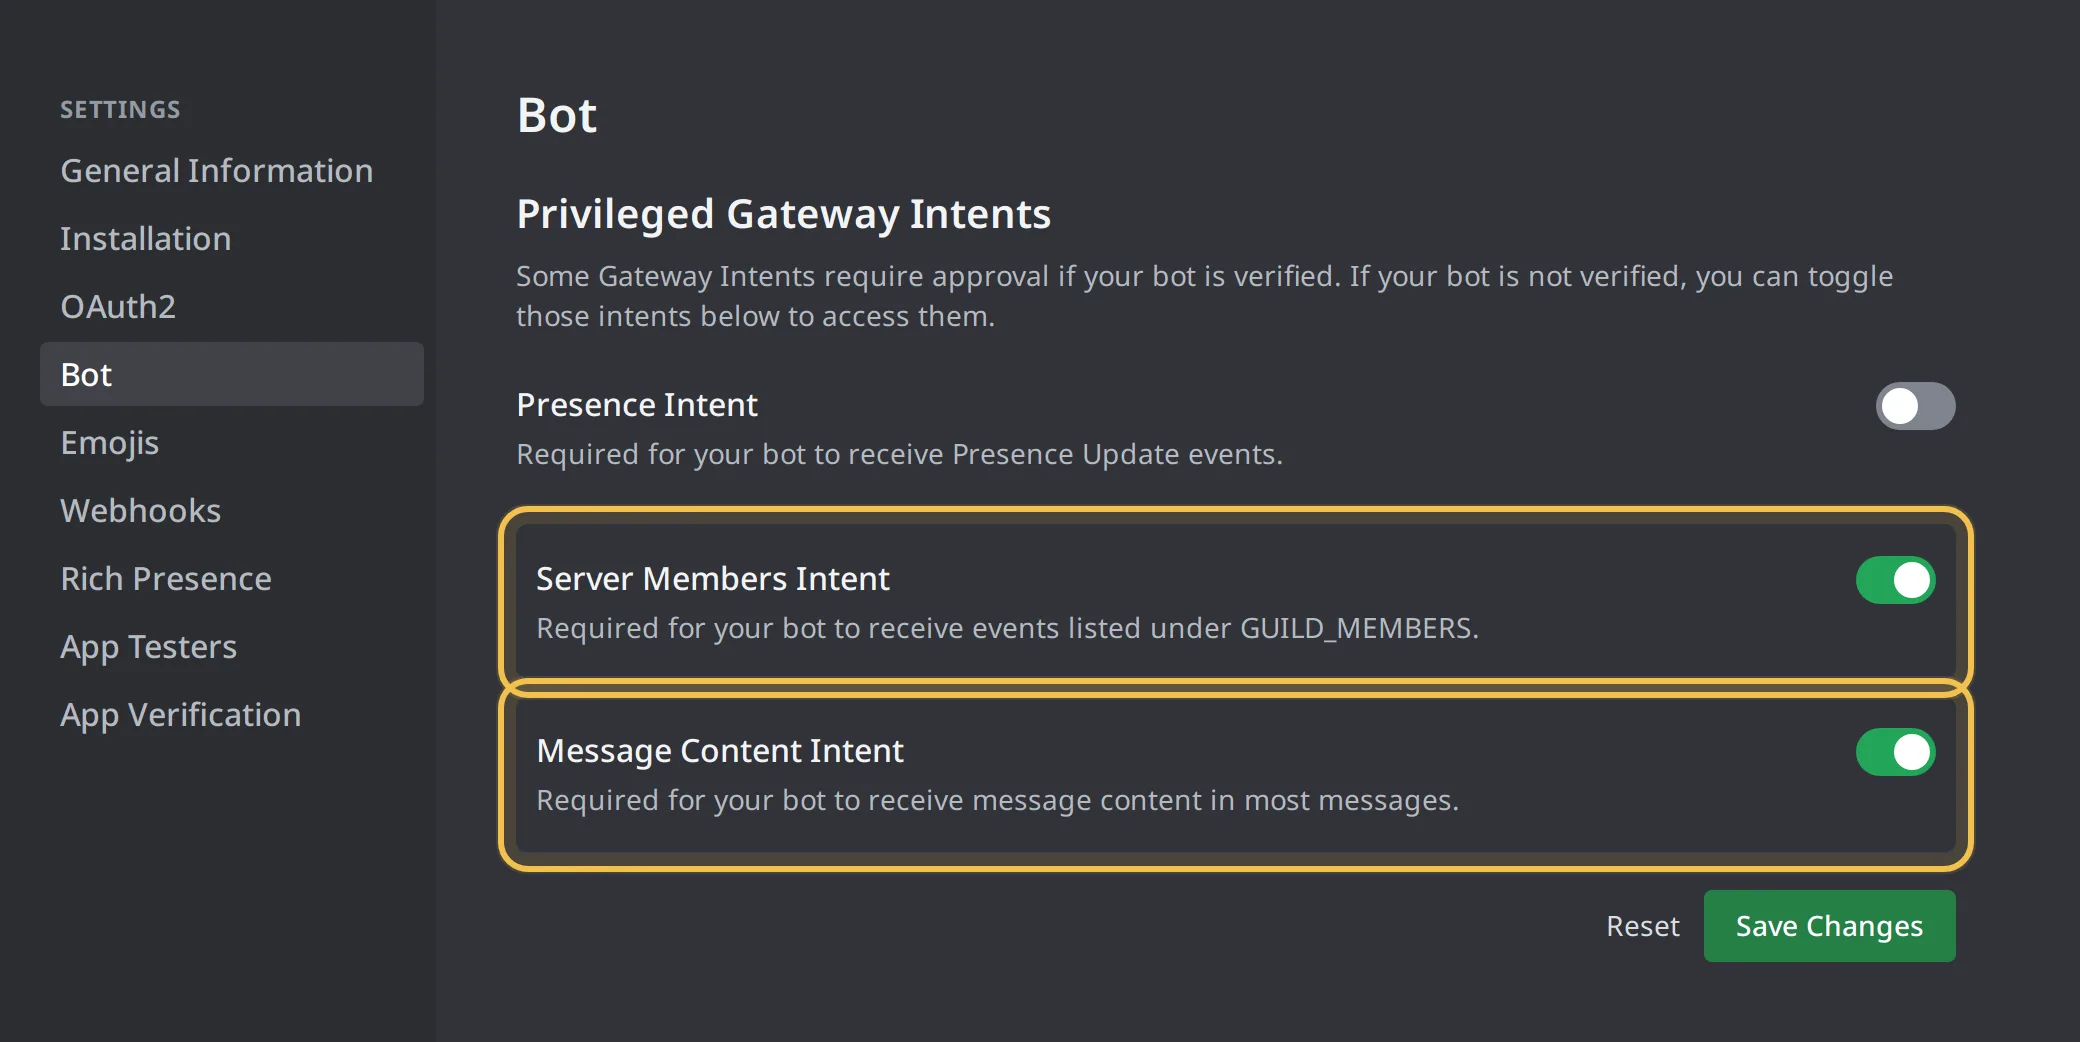 Privileged Gateway Intents
See Message Content intent and Server Members intent.
4. Paste the token
- In the dashboard, open Custom Bot.
- Paste the token in the Bot token field and click Connect.
We check the token and the intents with Discord.
5. Invite the bot
- Click Invite. Discord opens with your server selected.
- Check the server in the list and click Authorize.
- Come back to the dashboard.
See Why isn't the bot on my server?.
6. Choose the name and avatar
- Click Upload avatar and pick a picture.
- Type the bot's name.
- Click Save and continue.
7. Start the bot
- Click Start.
- Wait a few seconds until the status goes from Starting to Online.
If it stays offline, see My Custom Bot is offline.
Still stuck? Ask on the support server.
Next steps
Was this helpful?